首先安装 nodejs,我们采用 NodeSource 编译的 Node.js 源
curl -sL https://deb.nodesource.com/setup_6.x | sudo -E bash - apt-get install nodejs
然后安装 PostgreSQL
sudo apt-get install postgresql
创建数据库用户onlyoffice
sudo -i -u postgres psql -c “CREATE DATABASE onlyoffice;”
sudo -i -u postgres psql -c “CREATE USER onlyoffice WITH password ‘onlyoffice’;”
sudo -i -u postgres psql -c “GRANT ALL privileges ON DATABASE onlyoffice TO onlyoffice;”
然后安装 redis 和 rabbitmq
sudo apt-get install redis-server rabbitmq-server
如果需要修改 DocumentServer监听端口,可以运行:
sudo echo onlyoffice-documentserver onlyoffice/ds-port select <PORT_NUMBER> | sudo debconf-set-selections
把其中<PORT_NUMBER>修改为想使用的端口号(我没改)。
然后安装 DocumentServer
sudo apt-key adv –keyserver hkp://keyserver.ubuntu.com:80 –recv-keys CB2DE8E5
sudo echo “deb http://download.onlyoffice.com/repo/debian squeeze main” | sudo tee /etc/apt/sources.list.d/onlyoffice.list
sudo apt-get update
sudo apt-get install onlyoffice-documentserver
安装过程中会提示输入 PostgerSQ L数据库密码,输入 onlyoffice,然后确认。DocumentServer 就安装好了。
由于 OnlyOffice 默认使用 nginx,服务器上装有 nginx的话,OnlyOffice会在/etc/nginx/conf.d/ 下放置几个配置文件,把 onlyoffice-documentserver.conf 删掉,启用文件名带 SSL 的那个,把里面的域名改成 office.xxx.com(不能和 NextCloud 的相同),配置好证书路径。
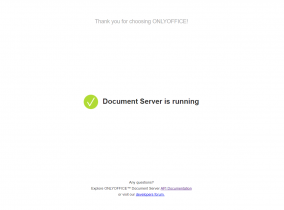
打开浏览器,在地址栏输入https://office.xxx.com,如果能出现下面页面就说明 DocumentServer 安装好了。

最后在 NextCloud Apps 里安装 OnlyOffice 插件,然后在 Additional Settings 里面的OnlyOffice 一项中填入上面安装 OnlyOffice 虚拟机的地址和端口,点 Save 即可。

共有 0 条评论